
I Ordered My Book!
Today, I finally finished the editing of my book, and finalised all my decisions. The book cost me $90 including express postage, which I don't find too bad considering that's usually how much books like these cost. I'm really excited to receive it in the mail, I'm just hoping it arrives in time. It's set to arrive on October 4th, which is cutting things really close since the PP night is the 6th, but if I doesn't arrive, I guess I will need to come up with a backup plan. I can't wait to see my final product!

Film Pictures
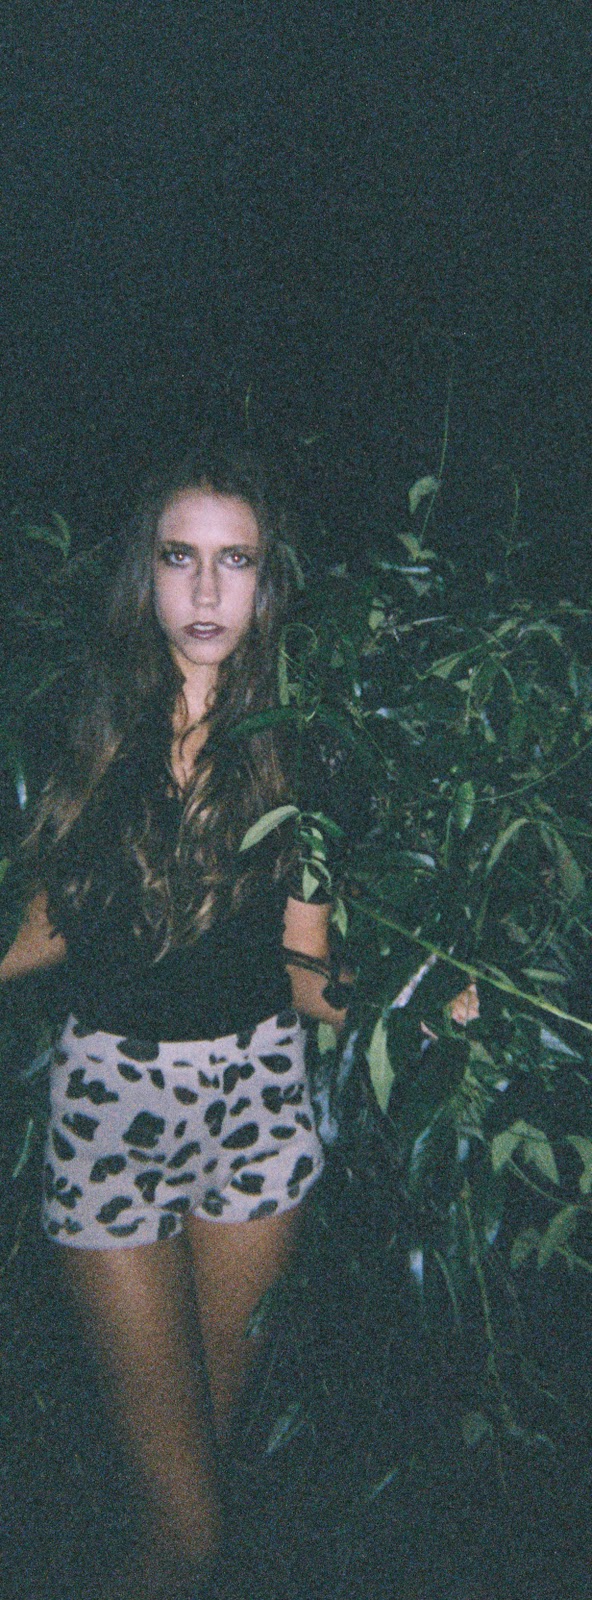
A few weeks back I went and picked up my pictures from my disposable camera. So far I've decided to use only one of them in my book, because the quality is obviously really bad. But personal project for me has been an experimental thing, so using the disposable camera's was just a fun thing to do.
Here are the few photos from the camera that I took for PP:


Written
Today I had to decide what I was going to write in my book, obviously because its a book dedicated entirely to photographs, it doesn't require a lot of writing. But in the flap of my book I need to write something, I looked at some of the coffee table books that I owned and, usually the flaps spoke about the content of the book or the author, so I decided I'd write something very small combining both these topics, I wrote:
"Filled with images which I have taken over the past 12 months, this book is a true INSIGHT into my love for fashion and photography. Having loved fashion since I was young and developing a interest in photography as I got older, this book aims to incorporate my love for both fashion and photography and produce beautiful images."
I thought it was simple and to the point, and gave a bit of an insight into what the book contains.
On the first page of my book I wanted to incorporate a quote, I looked through some interesting ones, but came across the following and thought it would be perfect:
I feel like this quote relates perfectly to my book. I'm pretty much at the stage now where I can order it.
On the first page of my book I wanted to incorporate a quote, I looked through some interesting ones, but came across the following and thought it would be perfect:
“ Beauty can be seen in all things, seeing and composing the beauty is what separates the snapshot from the photograph. – Matt Hardy
I feel like this quote relates perfectly to my book. I'm pretty much at the stage now where I can order it.
Overall Reflection On My Pictures and Process
Overall I'm really happy with the outcome of my pictures, before the Personal Project, I would never have thought I would be producing pictures to this quality. Looking at the pictures has also made me realise over the 12 month period, that heaps of practice can really improve the quality of how the pictures look. When I look at my first shoot and then my last shoot, I noticed how much has improved, not only with the quality of the pictures, but also the editing and styling. This entire process has definitely been a big learning one, and I'm so glad I did this, because I think if I hadn't, then I probably would never have gotten to it. Personal Project has made me really confident with taking photos now, initially I was scared and embarrassed to take photos anywhere in public, but by the time I got to the photoshoot with Adriana, I couldn't have cared less, Bond Uni is such a busy place, but that did not bother me when we were doing the shoot there. Personal Project also lead me to find hundreds and maybe thousands of inspiring pictures which I collected into an album over the period, and often found myself looking back onto this album when I was in need of some inspiration, it also allowed me to find so many different amazing bloggers! Before personal project, I probably would have had no idea how to use the 'curves' function in photoshop, but now I think I could use it with my eyes closed. It's all these little aspects that make me so happy that I completed personal project, because as much as I love photography, sometimes I just don't have the motivation to go out there and organize photoshoots, but personal project was really a motivator for me, and now I'm ready to do as many shoots as I can, especially after looking at all the teenagers like myself who have such incredible careers already.
Even though I'm really proud of my work, there are some things I would definitely change if I had been given the oppurtunity. I feel like all my pictures were too 'modelled' and I blame that mostly on myself for not directing the models myself, in my eyes I just wanted to let them do whatever they felt most comfortable with, but after looking through so many blogs, I wish I directed them more, I would've loved to have more 'natural', carefree, action shots that didn't make the pictures look so 'posed'. I also wish that I had planned some of the shoots to more detail, because sometime's we'd turn up, and just kinda went with the flow, which often lead us to be out of time etc, whereas if I had planned it more, It would of gone more smoothly, plus I would've been able to have created some better pictures. I also wish I used more props in my photos, because one simple prop can add so much to the pictures. But having said all of this, it's just like the saying 'practice makes perfect', this is just a lesson for me to realise what to do next time, these were the first 'big' photoshoots I'd ever done, so I wasn't really sure what to expect or how things were going to go, I just wanted it to be perfect though considering I was going to be displaying it to so many people. I think the process I used was reasonably good, and it managed to get the job done. I really enjoyed personal project, it was stressful at some points, but I feel like I've gained alot from doing this.
Even though I'm really proud of my work, there are some things I would definitely change if I had been given the oppurtunity. I feel like all my pictures were too 'modelled' and I blame that mostly on myself for not directing the models myself, in my eyes I just wanted to let them do whatever they felt most comfortable with, but after looking through so many blogs, I wish I directed them more, I would've loved to have more 'natural', carefree, action shots that didn't make the pictures look so 'posed'. I also wish that I had planned some of the shoots to more detail, because sometime's we'd turn up, and just kinda went with the flow, which often lead us to be out of time etc, whereas if I had planned it more, It would of gone more smoothly, plus I would've been able to have created some better pictures. I also wish I used more props in my photos, because one simple prop can add so much to the pictures. But having said all of this, it's just like the saying 'practice makes perfect', this is just a lesson for me to realise what to do next time, these were the first 'big' photoshoots I'd ever done, so I wasn't really sure what to expect or how things were going to go, I just wanted it to be perfect though considering I was going to be displaying it to so many people. I think the process I used was reasonably good, and it managed to get the job done. I really enjoyed personal project, it was stressful at some points, but I feel like I've gained alot from doing this.
Making the Book.
All the time spent towards personal project the last 2 weeks has involved me just creating my book mostly, I want it to be perfect so I'm making sure that I've chosen the pictures I love the most and the layout etc is all perfect. Along the way I've also re-edited heaps of photos because some didn't look as good once I had put them against other photos in the book. It is a much more time consuming process that I had expected, but that's probably because I want it to be of the best quality. Luckily, the program is super easy to use and I can save it and come back to it later.


Photoshop Curves!
Today I spent the entire day practically re-editing half of my photos with the photoshop curves that I downloaded from Julia's blog, I am in love with them, I think they really make a picture look better. It was a very time consuming day for me, but it was worth it, because I like the way some of my photos look now alot better. I started by editing the pictures of Adriana from the shoot the other day, because I hadn't even begun to edit them yet, I feel like the curves worked amazing on these pictures, mainly due to the beautiful colours that was incorporated into these photos.
Here's a Before & After shot once I had applied one of the curves:
Here's a Before & After shot once I had applied one of the curves:


At this point in time, I'm pretty much 100% happy with the way my photos look, I'm ready to complete designing my book so I can order it.
Inspiration & Free Photoshop Curves: Julia Trotti


 Lately I've been admiring the photography of 19 year old Sydney sider Julia Trotti. Not only is she an amazing young photographer, already shooting fashion lookbooks, musicians and weddings...she is also willing to help out photographers like myself. I really love her blog, it has so many helpful articles for people to help them reach the best of their capabilities. She has an incredible versatility within her photos, she doesn't stick to one type of style, she can go from doing a shoot at the beach to a shoot at a cemetary, and do both so perfectly. She really is an incredible photographer, and I'm so glad that this personal project process has allowed me to see so many young photographers like myself.
In a few posts back, I spoke about Nirrimi and photoshop curves, I was absolutely in love with the colour tones of Nirrimi's photos, and when I came across Julia's blog, I felt as if her colours were very similar so it made me wonder if she had used 'curves' aswell, and having looked through her blog, it turns out she does, and unlike Nirrimi, she gives them out for free! I was very excited to have seen this, so I downloaded every single one of her curves which she had on her blog. In order to use the curves, you need the latest version of Photoshop, so that was the next thing I downloaded.
I'm extremely excited to try out some of her curves on my photos! The only thing is that I wish I had found out about these curves before I edited practically all my photos, this means I'm going to have to re-edit most of them if I like the way they look with these curves better than the ways I've already edited them.

an example of one of Julia's curves
Shoot #6: Adriana


Today was my last shoot before I finish creating my book and send it to get printed. I did my shoot with Adriana, and the location was bond university. I was really happy that we used Bond University as the location because I felt like I had been using too many nature areas, and I wanted something more 'industrial' so I'm glad this wasn't completely a nature shoot. I was surprised as to how many good places there were within Bond to take photos. Adriana brought along a whole suitcase of clothes, which was good and bad, good because it meant we had a lot of clothing to work with, bad because we had to carry it around with us to each place we were shooting. It also meant that everytime we wanted a outfit change we had to walk all the way back to the bathrooms carrying the suitcase around with us. Firstly we started of by using a patch of flowers and I styled Adriana in a cream dress, because I wanted these pictures to be really elegant and pretty, and I thought the dress represented that perfectly. Next I got her to wear jeans, heels and a fur vest, and we went to take photos on some steps, but unfortunately it was already getting pretty dark because we were shooting in the afternoon, so the lighting wasn't that great, so those photos didn't turn out very well. So we decided to try and see if the light was better anywhere else, we found some other stairs and took some photos there, but then I decided that all the good lighting was gone and it was best to call it day. Having barely gotten anything done, we decided we'd come back again the next day, which is what we did. We came back the next day at an earlier time to ensure we wouldn't lose any light. We started of by taking some pictures infront of a plain wall, I styled Adriana in a mint coloured sheer top, denim shorts and red lipstick, I loved the way all the colours worked together. Next we went towards some stairs, and I styled Adriana in a long blue maxi skirt, white top, necklace and kept the red lipstick on, I loved the vibrancy of the blue skirt and red lipstick, with the lake in the background, it worked as a beautiful backdrop, combining nature. Adriana's next outfit change was a sheer black skirt, white top and fur scarf, we took some photos infront of a small bridge with that outfit on, and then we made our way to a massive stair case where we took more on the stairs and then some infront of some pillars. I loved the way these pictures turned out, it was a really long and tiring two days however, and this was definitely the most time consuming and long photoshoot I've ever done, but I'm really happy with it, and I think it's the perfect last photoshoot for my personal project!
Blurb
With the consideration of the book title and covers coming into mind lately, I've decided to look into where I am going to be ordering my book from. I spent some time looking online, I came across what seems to be a really reliable and good website known as www.blurb.com. This website enables you to download a special program which gives you the ability to design the book yourself, which is ensuring to me that it will turn out exactly how I want it to. The website gives you hundreds of options on how you want your book to look, so I downloaded the program and designed a few pages to get me used to the program, even thought I haven't finished all my photoshoots, atleast this will give me a bit of a headstart.


Title of my Book and Front and Back Cover!
Recently I've been thinking about what I am going to call my book, I feel like this is a really important decision to my final product, as the title will be the first thing that people will see and look at. I don't want to call it something plain and boring like 'Sarushka's Photo's' I wan't it to have a catchy title, and a title similar to what you'd find on a real coffee table book. After having spent ages thinking about it, I have come up with the idea to call my book 'INSIGHT'', I have chosen this as the name for my book because I believe that that's exactly what this book is, it's an insight into what I love, an insight into my love for fashion and photography, and pretty much my world, I thought it was catchy, looked professional, and I really liked the sound of it. Having said that, I had to now decide what I wanted to make the cover page look like. This to me, was harder than choosing the actual name of the book. Initially I had to choose whether I wanted a picture on the front cover of the book or not, after contemplating it for AGES, I decided that it's best not to have a picture on the front, because either people or going to hate what they see or love what they see, its a 50/50 chance of having someone bother to even look at it, whereas if I make the cover plain and simple, people are intrigued about what it's about which leads them to want to look at it. I drew up 3 feasible designs for the front cover in paint, and then chose the one which I liked the best.
Here are the three designs:

I ended up choosing the middle design because I felt like the first design was too simple, whereas the last design was too complex, I liked the simplicity of the middle design, I thought its appearance will be effective in getting people's attention, but not giving too much out about the book just yet.
I didn't want people to look at my book though and have absolutely no idea what it was going to be about, so I decided to include a picture on the back of the book, I didn't want the picture to show anybodies face, and I wanted to stay in the black and white theme, so I ended up choosing a picture from my photoshoot with phoebe and brooke, and I used a picture of phoebe with her almost bareless back facing the camera, I really love this photo and think it suited being on the back of the book perfectly.

Editing for Shoot #5
Today I spent editing the pictures from my shoot with Brooke and Phoebe at Pizzey Park. I loved editing these pictures just because the lighting was so perfect in the photos and I just love the way they turned out.
I followed the same process as I do when I edit all my pictures:
I followed the same process as I do when I edit all my pictures:
- Sort and organize through the photos I like the best and am going to edit, and put them into a seperate folder
- Sort the photos into seperate albums depending on the outfit
- Edit a few pictures from each outfit album and see how I like it edited the best
-Includes adjusting exposure, colours etc
-Applying effects
-Changing colours of things
-Clearing imperfections on skin
-Applying lipstick colours etc if necessary - Edit the photos from each outfit nearly exactly the same, so they have the same colour tones, effects etc


Shoot #5: Brooke and Phoebe at Pizzey Park
Yesterday I did my 5th photoshoot for my personal project at Pizzey Park, this has to be one of my favourite shoots I've done yet, I just thought the location and styling was really perfect and worked so well together. I wanted to do the shoot in the afternoon because that's when the light shines through the trees and creates a beautiful setting, usually I hate taking photos in the afternoon because the lighting is terrible, but this time I really wanted the sign to be at level with the trees so it could beam through, and I'm glad I did do it in the afternoon because it really turned out amazing! We started off when the sun wasn't really setting as yet, just so we could get some normal shots without the sun in the way. For this shoot, I wanted really nice, long, dressy outfits because I think it suited the surrounding. I styled Brooke in a long white maxi dress and phoebe in a cream bodice and leopard printed maxi skirt, with this outfit, I got Phoebe to use a black lace mask as a prop for some of the pictures, and I loved the way that looked in the photos, it really added that extra touch. The next outfit change was a contrast between black and white, Phoebe wore a crochet white backless dress/top with a cream skirt and Brooke wore a black bodysuit and long black maxi skirt, I loved the contrast between the two colours. I thought however it was missing something, so I decided to make Phoebe wear red lipstick for that extra pop of colour, and I love the way black, white and red go together. I took pictures of both Phoebe and Brooke together, and then some individual shots. The difficulty of this shoot was that all the trees looked the same, so it was hard to try and make the pictures look different, but I played around with angles and lighting to change it around a little bit. At this point the sun was making its way into the trees, and the lighting was perfect! So we did another outfit change, Brooke was in a black pleated skirt, white top and fur vest and floppy hat, and phoebe wore a pink top, cream skirt and oversized knit jumper. I took photo's in heaps of different angles, to work with the sun as best as possible, and I loved the outcome, these could possibly be my favourite out of all the photos I've taken, just because the way the sun came through the trees worked so perfectly. I loved this shoot, I wish we could've stayed longer and had one more outfit change, but we we're running out of time, so we had to leave.
I'm really excited to edit these pictures!
Here's some of the unedited pictures from the shoot aswell as a screenshot:


I'm really excited to edit these pictures!
Here's some of the unedited pictures from the shoot aswell as a screenshot:


Editing for Shoot #4
Today I spent editing the photo's from my 4th shoot at the graffiti warehouse and at my house. Editing these pictures were a lot of fun due to the different colours and the capability to do so much with it. I changed the hue's in some of the photos, to adjust the colour of the graffiti, and in some of the pictures I even added some bright lipsticks to Jenna to contribute to the Bright colour factor of the pictures. I'm so happy with the way the edited versions have turned out!
Here's a few of the pictures:


Here's a few of the pictures:
Shoot #4: Graffiti Walls & Normal Walls with Jenna!
June 6th, 2011.
Today was my 4th photoshoot, I haven't done one in ages, so I'm feeling a little behind, but I had heaps of fun during today's shoot. One of my idea's which I've had for ages to include in my personal project is the use of Graffiti to incorporate with the pictures. Well, recently I found out about a graffiti warehouse in Mermaid, I had seen some pictures of it, and I thought it would be the perfect location to take some photos, because I had been searching for ages for some good graffiti walls, and once I found out about this place, I was very eager to get these photos done. It took some time to find the place today, but once we did, we got straight into the photos. Today I was shooting pictures of my bestfriend, Jenna. Initially she was very camera shy and it took her a lot of time to get used to the camera, which always works as a bit of a disadvantage as it makes me lose a bit of time, and waste photos, but once she warmed out, she was photographing beautifully! I wanted the clothing for this shoot to be very girly grungy, very bright to suit the graffiti and that's why I chose Jenna, because that's just her style, and with her medium length, straight her, I thought she'd suit the theme of this shoot great! I firstly styled her in a hot pink body suit and we took pictures amongst a whole bunch of walls, this is what I loved so much about this shoot, is that there were so many walls to work with! Next we moved on to a short black dress, with high maroon lace socks and thick heels. We took some pictures in this outfit infront of various walls aswell. But this is where things started to go wrong, the area, considering being a graffiti warehouse wasn't very safe, so we made the decision to leave early considering that it appeared there was some suspicious looking people in the area. I would've loved to have taken more photos, because this honestly was one of the most amazing locations to take pictures, but we we're more interested in being safe. So sadly, I didn't get many photos at the graffiti warehouse, we decided to go back to my house where I styled Jenna in a blue velvet dress and a bowler hat, and we took some pictures against a plain wall, which ended up looking really effective. I want to start editing them as soon as possible!
Behind the Scenes:


Photographer Inspiration: Nirrimi
'We Live Young' would have to be one of the most incredible blogs I have stumbled upon, the pictures which 19 year old photographer, Nirrimi takes, have left me breathtaken. It was only this weekend when I first saw her blog, and I was looking through the pictures right into the early hours of the morning, I just wanted to see more and more. At her age, she has accomplished half the things I want to do in my photography career, she has shot campaigns, travelled around the world shooting pictures for different agencies, brands, people etc and she hasn't even reached her twenties yet. Nirrimi's photo taste isn't identical to mine, but her talent is what leaves me so breathless, she can capture the true beauty of anything so perfectly, and every picture is incredible. I love her pictures because their so 'delicate' and even though I'm usually attracted to things a bit more raw and edgy, I just find her pictures so beautiful. She has really and honestly inspired me and proven to me that you can accomplish anything you want if you believe in your self and your photos. Looking through her blog, I discovered she uses what is known as 'Curves' to adjust the colour tones of her pictures, the colours of her pictures is one of the main things which attracted me to the pictures, so these curves really had me interested, after looking into it, I realised that she charges money in order to be able to use her photo curves in photoshop, which left me a little dissapointed, because I would love to have tried them on my photos, I'm going to download a trial of photoshop soon, and try and attempt to use curves myself, but having not alot ot experience with photoshop, especially with something so complex, I think I will probably have a bit of trouble. Here are some of Nirrimi's incredible photographs:


Subscribe to:
Posts (Atom)